The Inspiration
I keep picturing a small town of the past celebrating Independence Day in a grand fashion. Parades, fireworks, Main Street all decked out in red, white, and blue...Back when things were handmade and simple, and naturally had that vintage charm that everyone craves these days. I knew I wanted wood, and I wanted it distressed.
Step 1: The Build
We were all set to build our 6 ft.x10 ft. wall plank-by-plank, but then the hubby had a brilliant idea. There was a leftover fence panel and some scraps in our shop. The panel and partial section put together were the perfect size for the wall. A few 2x4s attached to the back to make it stand, and ta-da! Instant wall!
At first I was going to have him trip the scallops off the top, but then I thought, "What's more American than a white picket fence?"
Step 2: The Stripes
After the wall was built, I needed to lay out my American flag design. This part involved some math, but we made it anyway. The first step was to determine the width of our stripes: Total height of the wall ÷ 13 = the width of each stripe. The blue area is suppose to begin above the sixth stripe from the bottom and take up a little over a third of the total width, but those proportions looked funny to us, so we eyeballed it. (Sorry I totally forgot to take photos of this step! But you can see it well in the next image.)
Step 3: The White
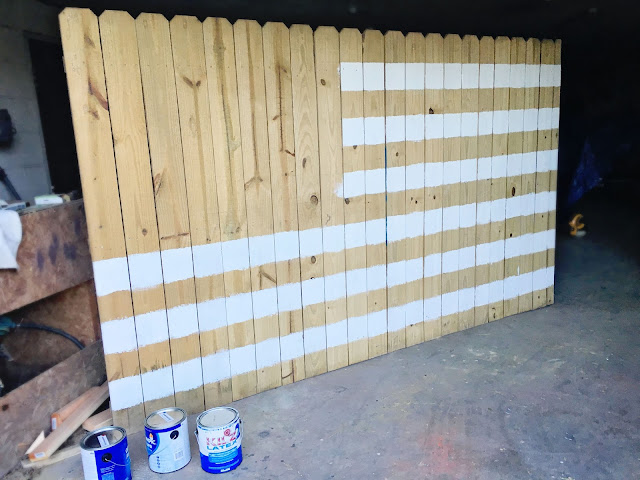
Then it was time to paint! Using a rule of thumb I learned from an art professor in college, I started with the lightest color first: the white. On the American flag, the top and bottom stripes are both red. So I began painting the second stripe white and went from there. It felt like the white took for-ev-er!!
Next, I filled in the remaining stripes with the red. To give the vintage feel, I chose a slightly darker red. This color seemed to go on faster (maybe because it's darker and covers better?), but that bottom stripe was a pain. This whole thing may have been easier to paint laying down, I dunno.
Step 5: The Blue
It was finally time for the blue! This section was super easy to paint, except for trying to stay super neat around the stripe edges. Again, I chose a slightly darker shade for a vintage feel.
Step 6: The Stars
This was definitely the hardest part of the whole thing. To make up the 50 stars, there are five rows of six stars and four rows of five. To figure out the size of my stars, I measured the blue area and divided the width by 6 and the height by 9. Using these measurements, I headed to Photoshop (because I use PS for everything!) and created a stencil. While I was there, I also went ahead and created a digital model of how my 50 stars would look. I measured the distance from the top and side of the document to the tips of the first star so I would know where to start laying out the stars on the actual wall. I still ended up being a little off toward the end of the row, but at least this project is supposed to look handmade and un-perfect.
Using my stencil, I drew all the stars on with a pencil. Then I used one of my favorite art brushes (that my mom got from the part store of all places) to fill them in with white.
Step 7: The Distressing
Using an electric sander and a couple variations of grit, I sanded the entire wall, paying extra attention to the edges. The hubby and I then moved it out into our yard to weather for several days (man, this thing is HEAVY!). It's not heavily distressed, but definitely has the "new" knocked off of it.
I couldn't wait to see how this thing looked in photographs, so on Memorial Day we took our son out to do a super-quick mini session. I'm in LOVE with the images! Can't wait to use it for Summer Mini Sessions in July!


No comments:
Post a Comment